
Neural networks are one technique which can be used for image recognition. This tutorial will show you how to use multi layer perceptron neural network for image recognition. The Neuroph has built in support for image recognition, and specialised wizard for training image recognition neural networks. Simple image recognition library can be found in org.neuroph.contrib.imgrec package, while image recognitionwizard in Neuroph Studio canis located in [Main Menu > File > New > Image recognition neural network]
This tutorial will explain the following:
1. Basic principle how multi layer perceptrons
are used for image recognition (one possible approach is described here)
2. How to train neural networks for image recognition with Neuroph Studio
3. How to use neural networks trained for image recognition in your applications
Every image can be represented as two-dimensional array, where every element of that array contains color information for one pixel. (picture 1)

Picture 1. Image colors
Each color can be represented as a combination of three basic color components: red, green and blue.

Picture 2. RGB color system
So, to represent some image in a RGB system we can use three two-dimensional arrays, one for each color component, where every element corresponds to one image pixel.
int [][] redValues
int [][] greenValues
int [][] blueValues
For example, if pixel at location [20, 10] has color RGB[33, 66, 181] we have
redValues[10][20] = 33;
greenValues[10][20] = 66;
blueValues[10][20] = 181;
The dimensions of each of these arrays are [imageHeight][imageWidth]
We can merge these three arrays into a single one-dimensional array so it contains all red values, then all green and at the end all blue values.
Thats how we create
flattenedRgbValues[] array.
The dimension of this array is [imageHeight * imageWidth * 3]
Now we can use this one-dimensional array as input for neural network, and to train neural network to recognize or classify them. Multi layer perceptrons are type of neural networks suitable for this tasks (picture 3).

Picture 3. Feeding multi layer perceptron with color information from image. Each input neuron corresponds to one color component (RGB) of one image pixel at a specific location.
Each output neuron corresponds to one image or image class. So if network output is [1, 0, 0] that means that input is recognized as 'image A'.
We can create training set for training neural network as set of pairs of input (flatten rgb arrays), and output vectors (where corresponding image neuron is 1).
Network can be trained by using Backpropagation learning algorithm.
In next section we'll provide some details about the neural netwok and learnig algorithm.
Neuroph Studio provides environment for creating and training neural networks, which can be saved as ready-to-use java components. Also it provides specialised image recognition tool to train neural networks for image recognition. Creating and training neural network for image recognition consists of the following steps:
Step 1. To create Neuroph Project click File > New Project

Select Neuroph Project, and click Next.

Enter project name and location, click Finish.

This will create the new Neuroph Project.
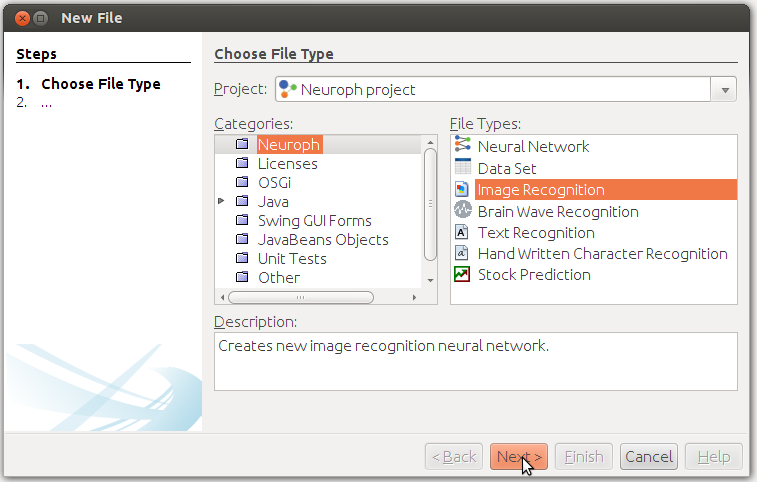
Step 2. Next, to create image recognition network, click File > New File.

Select Image Recognition file type, and click Next.
Next, choose images you want to be recognized, by selecting individual image files or by adding whole image directoriey. You can also do the basic image editing like cropping and resizing, by opening simple
image editor with edit button.
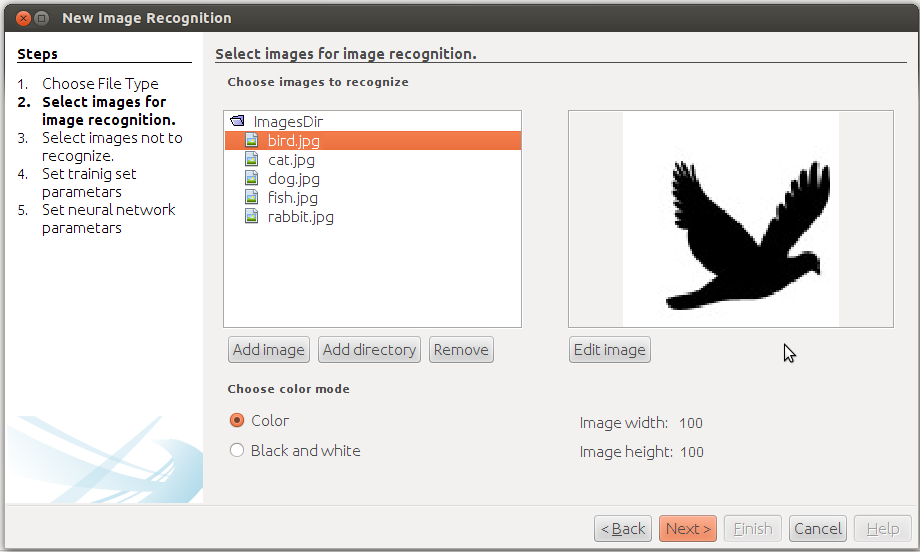
Color mode - You can use image recognition in full color mode or in binary black and white mode. The binary black and white mode represents pixel as [0, 1] and so it uses less number of input neurons. For some applications (like character recognition for example) binary black and white mode may be optimal solution.
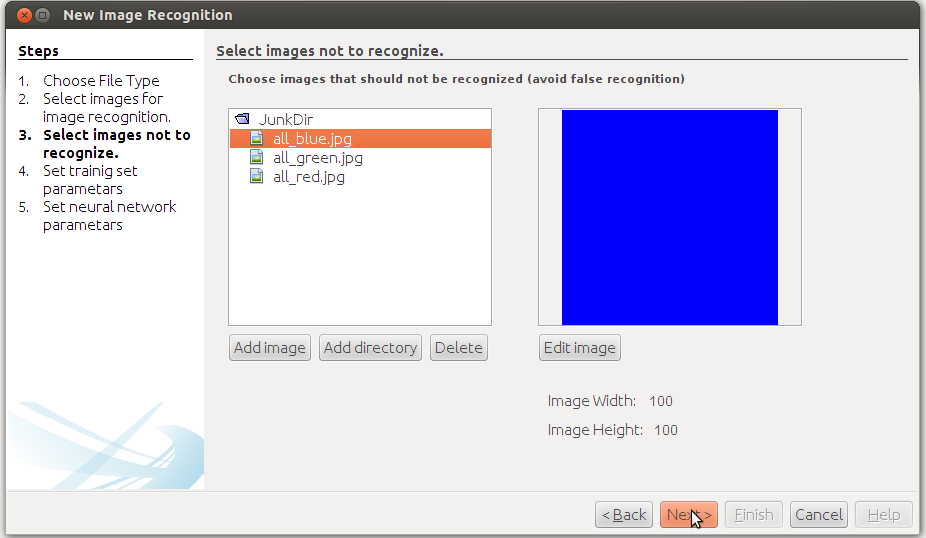
In next step choose image that shoul dnot be recognized, which will help to avoid false recognition. Usually these are blocks of all red, all green and all blue images, but also migh include others.
When you test your image recognition network, you'll figure out what makes sense to include here.
Then, enter Training Set Label and Image Sampling Resolution, and click Next.
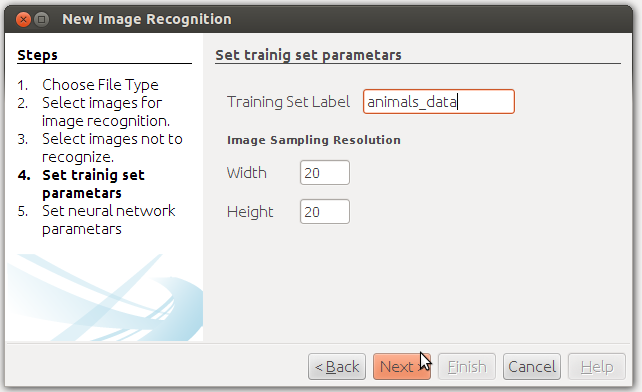
Training Set Label - Since you can create several training sets while experimenting with network, it is a good practice to label them.
Image sampling resolution (width x height) - All provided images will be scaled to this size (width x height). Scaling images will make them smaller, and they will be easier and faster to learn. The image dimensions determine the size of input vector, and number of neurons in input layer. (if you get java heap exceptions for some dimension, try to increase heap size for JVM)
For start, you can use the default settings (20x20 resolution and color mode), and just provide the images.
The next thing to do, is to create the neural network.
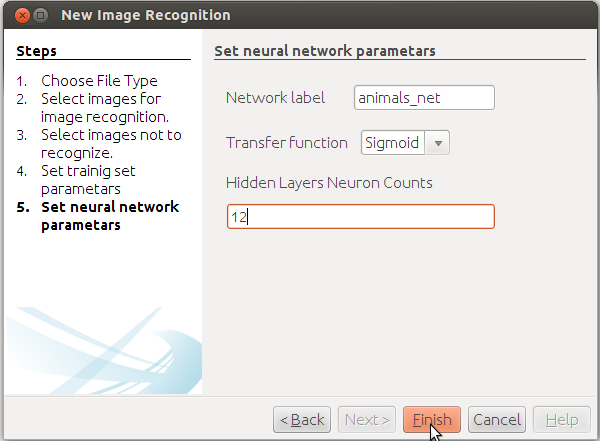
To create the neural network you need to enter the following:
Network label - The label for the neural network, which is usefull when you create several neural networks for the same problem, and you're comparing them.
Transfer function - This setting determines which transfer function will be used by the neurons. In most cases you can leave the default settings 'Sigmoid', but sometimes using 'Tanh' can give you better results.
Hidden Layers Neuron Counts - This is the most important setting which determines the number of hidden layers in network, and number of neurons in each hidden layer. Hidden layers are layers between input and output layer. The trick is to have the smallest possible number of layers and neurons which can succesfully learn the training set. The smaller number of neurons - the faster learning, better generalization. Suitable number of hidden neurons also depends of the number of input and output neurons, and the best value can be figured out by experimenting. For start, try 8x8 images and one hidden layer with 12 neurons, which is the default setting. If you wany to increase number of neurons, just enter the number for example '12' neurons. If you want to add more than one layer of neurons enter the number of neurons in each layer separated with space. For example, if you enter '12 8 6' it will create three hidden layers with 12, 8 and 6 neurons.
Click the 'Finish' button to create the neural network. Click network from projects view to open it.
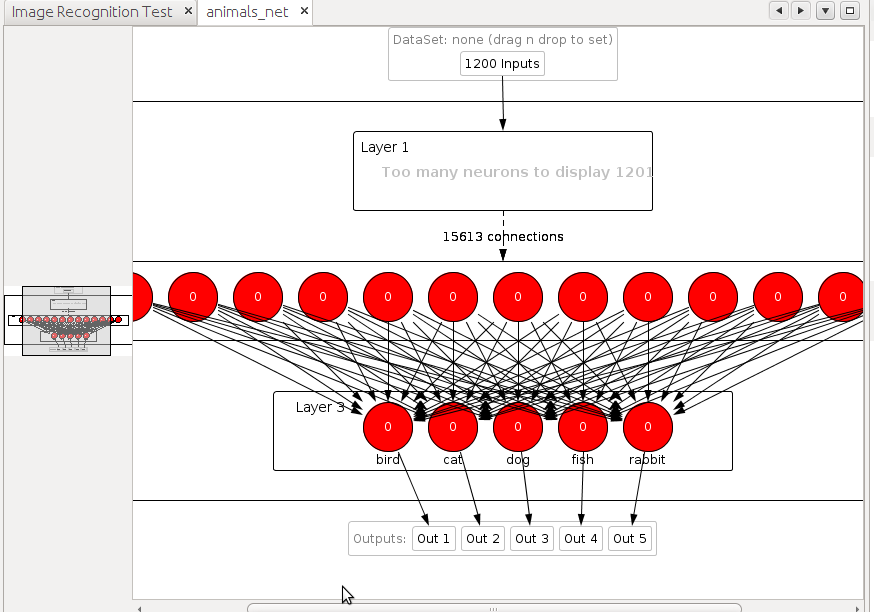
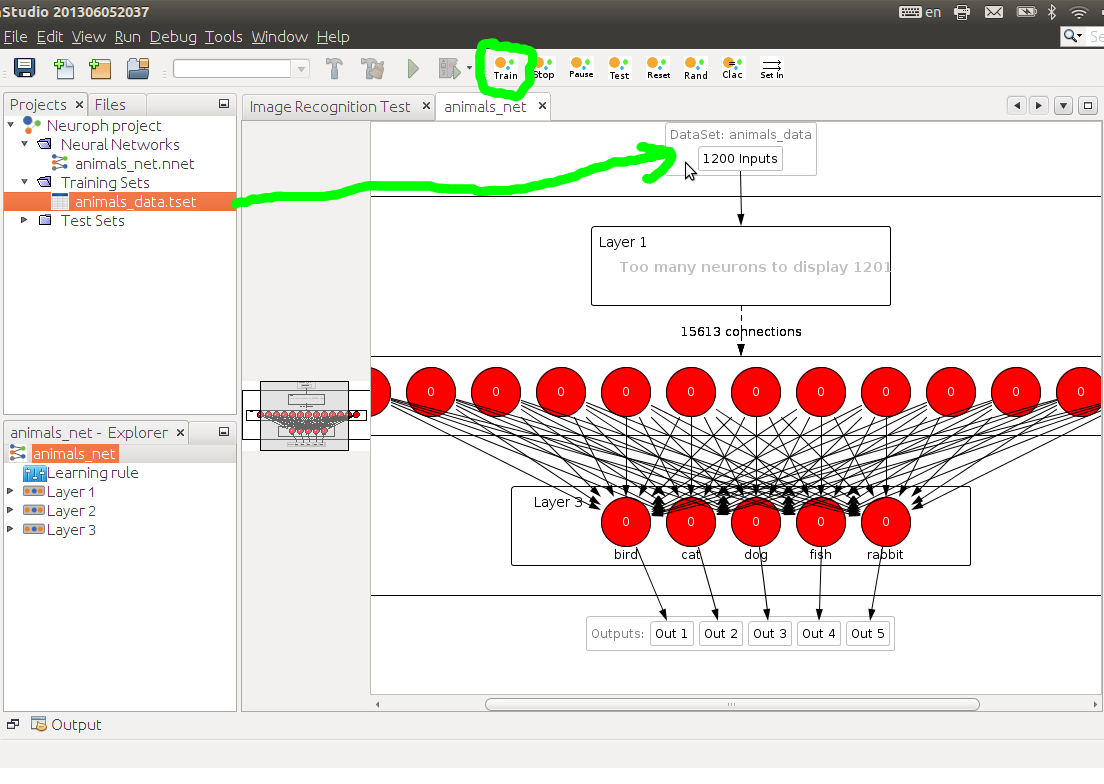
Step 3. Training network. To start network training procedure, drag n' drop training set to corresponding field in the network window, and 'Train' button will become enabled in toolbar. Click the 'Train' button to open Set Learning Parameters dialog.
This will open the dialog for setting learning parameters. Use the default learning setting and just click the Train button.
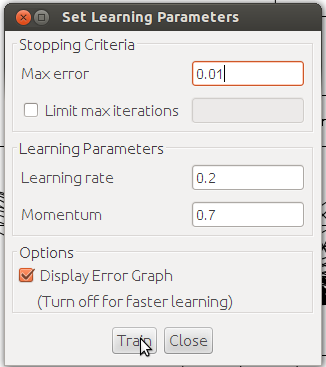
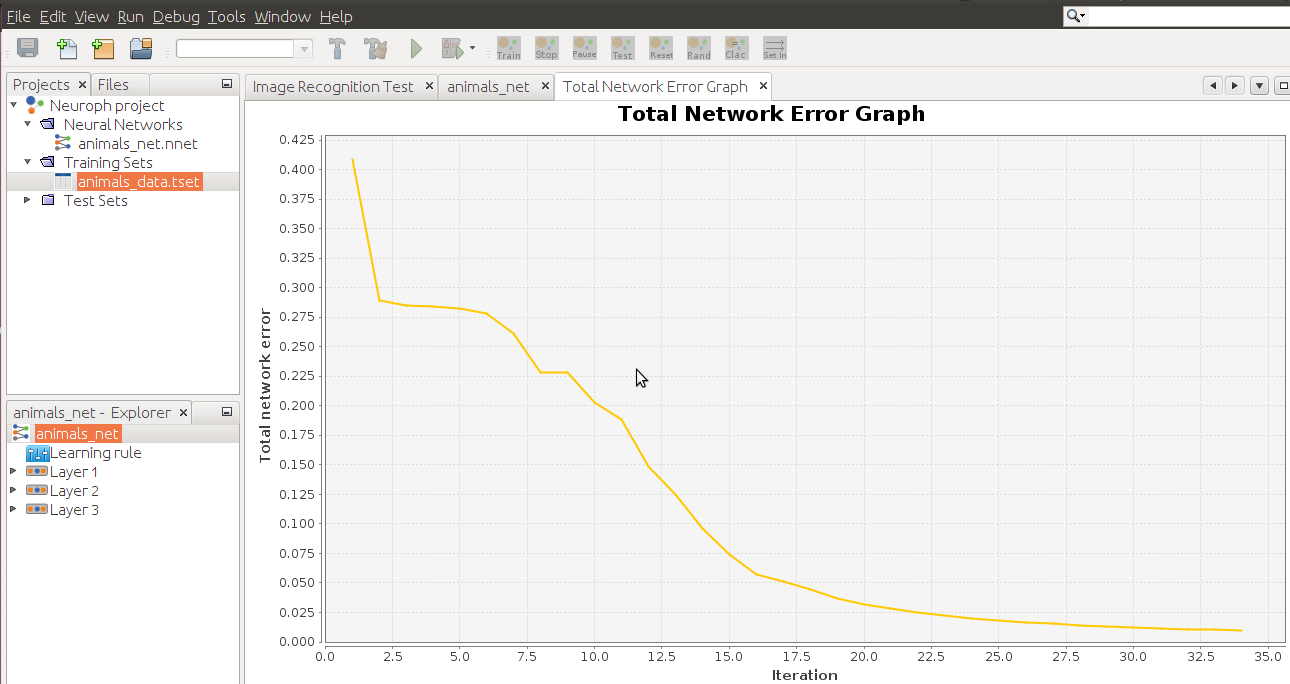
This will start training and open network learning graph and iteration counter, so you can obesrve the learning process. If the learning gets stuck (total network error does not go down), you can try with different number of neurons, layers or learning parameters. For learning rate and momentum use the values between [0, 1] , and for the error some small value bellow 0.1 is recommended. Some rule of the thumb values are 0.2 for learning rate and 0.7 for momentum.
Step 4. Test Network
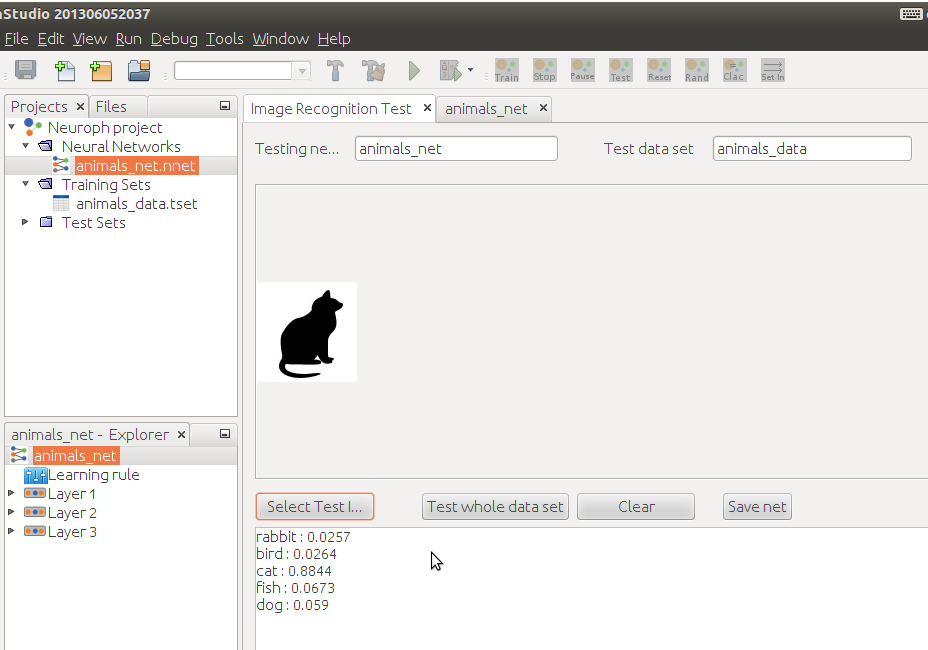
After you have trained the network you can try how it works in the test panel. Click 'Select Test Image' button to set input image for the network, and the network output will be displayed as the list of image labels and corresponding neuron outputs. The recognized image corresponds to the neuron with highest output. You can test the entire data set by clicking the button 'Test whole data set'.
Step 5. Save neural network
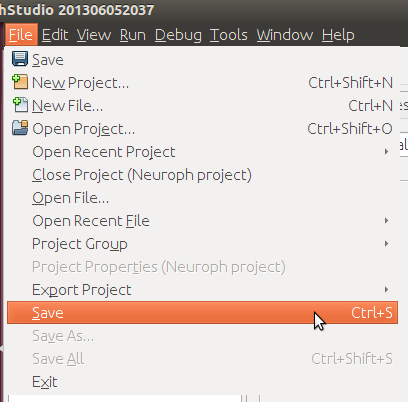
To save the neural network as Java component click [Main menu > File > Save] and use the .nnet extension. The network will be saved as seralized MultiLayerPerceptron object.
Here is the sample code which shows how to use the image recognition neural network created and trained with Neuroph Studio. You can run this sample, just specify correct filenames for neural network and some test image.
import org.neuroph.core.NeuralNetwork;
import org.neuroph.imgrec.ImageRecognitionPlugin;
import java.util.HashMap;
import java.io.File;
import java.io.IOException;
public class ImageRecognitionSample {
public static void main(String[] args) {
// load trained neural network saved with Neuroph Studio (specify some existing neural network file here)
NeuralNetwork nnet = NeuralNetwork.load("MyImageRecognition.nnet"); // load trained neural network saved with Neuroph Studio
// get the image recognition plugin from neural network
ImageRecognitionPlugin imageRecognition = (ImageRecognitionPlugin)nnet.getPlugin(ImageRecognitionPlugin.class); // get the image recognition plugin from neural network
try {
// image recognition is done here (specify some existing image file)
HashMap<String, Double> output = imageRecognition.recognizeImage(new File("someImage.jpg"));
System.out.println(output.toString());
} catch(IOException ioe) {
ioe.printStackTrace();
}
}
}
Actual image recognition is done with just one method call from ImageRecognitionPlugin:
imageRecognition.recognizeImage(new File("someImage.jpg"));
ImageRecognitionPlugin provides simple image recognition interface to neural network. You can recognize images from various sources like File, BufferedImage or URL. For example:
imageRecognition.recognizeImage(new URL("http://www.example.com/someImage.jpg"));
For more details check the classes in org.neuroph.imgrec package which is in ImageRec module.
To use image recognition classes, you must add a reference to neuroph-xx.jar and neuroph-imgrec-xx.jar in your project (right click project > Properties > Libraries > Add JAR/Folder)
1. Scale image dimensions used for training to the same dimensions to avoid possible issues.
2. Use the same color mode and image dimensions for training and recognition. If color is not important for you use black and white since training is faster.
3. If you get out of memory exceptions for bigger images increase size for the JVM with –Xms and –Xmx options.